Art is Basic has moved!

Art is Basic has moved!
Visit my new blog location by clicking on the Art is Basic logo.
Showing posts with label collage. Show all posts

Thursday, January 24, 2013

Valentine's Art Projects from the Past

Each year, I tend to try something different for Valentine's Day.  I like to spice things up, don't you?

Here are some from the past that I have done.

1.  Valentine's Heart Collages

 2.  Cool Hands, Warm Heart

3.  Easy Clay Hearts for Kindergarten 

    I have made these for Christmas presents, but they would be perfect for Valentine's Day.

4.  Maps of My Heart (by Kindergarten)

5.   Styrofoam Printed Valentines


P.S.  My new blog design is at ArtisBasic.com.  Check it out if you would like to get a sneak preview before the RSS feeds are moved over.

Sunday, October 21, 2012

Surreal House Collages


The fourth and fifth graders learned about Surrealism for this project.  I started by showing them how to set up their houses using colored construction paper.  These pictures were LARGE.. the size of a posterboard.  The individual colored construction papers were 9x12".  Each child started with 4 sheets of colored construction paper to set up their house.  Then, they flipped through magazines to cut out furniture and items for their houses.  After they had found a bunch of furniture, I introduced Surrealism to them through a slide show of art.  We discussed concepts such as dislocation (placing things were they don't belong), scale and size changes to create unusual relations and metamorphosis (changing things into something new).  They learned about artists such as Magritte, Dali and contemporary artist Sandy Skoglund.

The students had a fantastic time cutting apart magazine imagery and playing with different objects to create an unusual and surreal house.

Some of the detail shots were even more interesting than the entire image as a whole.

For example, this dog with a party hat and corn?  so fun!

Placing a bear head on top of a man?  hilarious!

Some of the students used colored tape to divide up the house into rooms and add stairs or ladders.


This student cut up lots of landscape imagery to make a background.


I love this interesting scene.


TIPS:  When I do this next year, I will request some furniture catalogs.. IKEA catalogs would have been perfect for this.  The kids loved to use animal pictures, so I might have requested some animal magazines from families as well. 

Thursday, September 27, 2012

Complementary Color Collages-- 1st Grade


Complementary Color Collages
by the 1st Grade


This project introduces the first graders to complementary colors.  I show them the color wheel and I explain how the complementary colors are across from each other on the color wheel.  They are the "opposites".  If you mix the two of them together you would get a brownish or grayish color.  We talk about the primary/secondary colors and focus on the pairs of red + green, blue + orange, and violet + yellow.  At this point, a kid usually will point out the intermediate colors and I show them how those also have complementary colors.  For this project, we focus on the complementary pairs I have listed above.  I also read them this cute book called "The Orange Book" by Richard McGuire.  It is out of print, but I picked one up on amazon.com last summer.  The story is about oranges, but the pictures are all printed in orange and blue (which is one of the complementary pairs we will be using.)  I often like to read a story book that is inspiring to the subject matter we are studying.
A bag with orange and blue materials.


Preparation:  Gather colorful materials and place them in ziploc bags according to complementary pairs.  I include:  paper scraps, colorful tape, foam letters and pieces, stickers, colored cellophane, pompons, crepe paper, paint chip samples and stamps.  I have these fun marker stampers:  Crayola 10 Count Expressions Washable Mini-Stampers which I put out for the children to use.  This is a great time to use up those bits and bobs and random scraps.

After the introduction, I place the bags of complementary color "stuff" at different tables.  Then I say, "All the students who want to use orange and blue in their collage, sit at this table." and so forth.  Usually the class is pretty evenly distributed.  Then, they use the materials however they would like to make a complementary color collage.  

I like this project because it allows the kids to explore the materials in their own self-directed way.  Each of them comes up with such unique ways to put the materials together.

At the end of the class, whatever is left over gets put back in the bags and I save them for next year (and replenish them as needed.)

in progress collage.

Kids open up the bags, share what's inside and talk about the materials with their neighbors.


This imaginative boy turned his collage into a sculpture!

This boy enjoyed drawing lots of fun pictures with his markers.


-->
How do you teach about complementary colors to the youngest students?

Tuesday, August 14, 2012

Fabric Collages


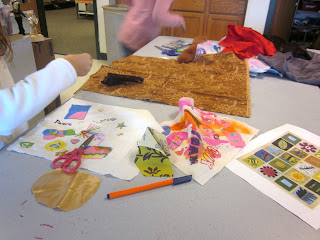
I never posted about these fabric collages that we finished at the end of the year last year.   The third and fourth graders made these.

We worked together to paint fabrics!


We painted with acrylic paints on muslin fabric. We sprayed the fabric with water to allow the paint to spread more easily.


We had lots of painted fabrics at the end.

We even painted over ugly patterned fabrics.

Then, we chose our pieces and cut them up!

Some of the students chose to make a fabric collage with a friend.

We cut pieces, glued them and added stitching!

Lots of colors and designs.


Ribbons were a nice embellishment.


We learned and practiced our stitching skills.

You can still see some of our doodled designs in the cut up pieces.


This project was challenging and we explored many new skills.


LinkWithin

Related Posts with Thumbnails