Art is Basic has moved!

Art is Basic has moved!
Visit my new blog location by clicking on the Art is Basic logo.

Wednesday, October 10, 2012

Leaves!-- Kindergarten


Always a popular fall activity, we made leaf rubbings last week.

Then, using our new Gelli Plates, we pulled prints of the leaves.  


To do this, we rolled acrylic paint on the plate.  The kids then rolled textures in the paint using texture rollers.  Leaves were placed on top.  Then, white paper was placed on top of the plate.  We rubbed the back of the paper with our fingers and then pulled the paper off to reveal these leaf prints.                                                                        


To keep the activity organized, I had the kids at their tables doing the crayon rubbings.  Then, I called the kids up three at a time, so I could monitor the printing.  The kids had so much fun using the texture rollers, that sometimes they would roll and roll and roll until the textures were just kind of lumpy.  oh well!  I think we will have to break out the texture rollers again and just play with them on paper.  I precut all of the construction paper squares in various shades of orange, red and yellow.  The next period, the kids gathered their leaf rubbing, leaf print and chose one colored square.  They glued them all together and then could add marker on the frame if they wanted. 


Tuesday, October 9, 2012

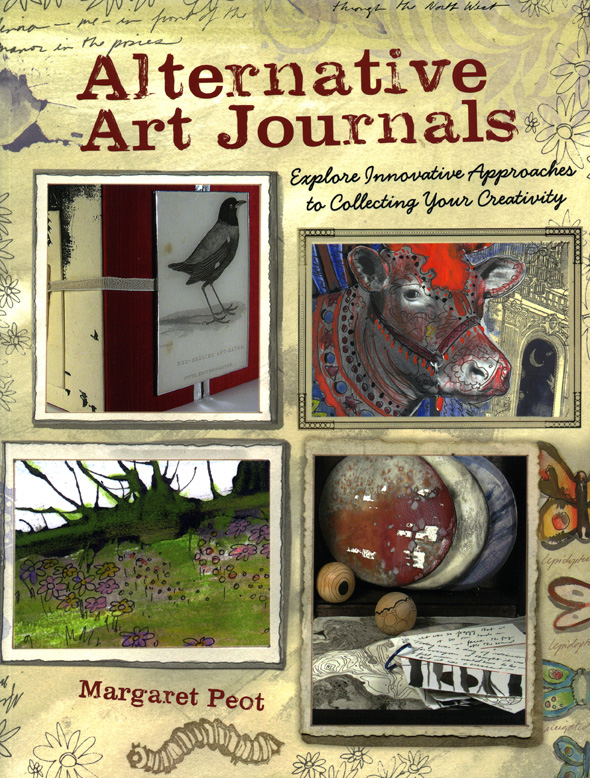
Alternative Art Journals Book Giveaway

The editors at F + W media were kind enough to send me a review copy of Alternative Art Journals: Explore Innovative Approaches to Collecting Your Creativity, by Margaret Peot.  I anxiously awaited the arrival of the book and it came today.  I love art journals (as you may know) and this book could be a great addition to your resource library.  If you click on the link above you can "search inside the book" at amazon.  There are several "out of the book" type art journals with step-by-step directions, including a box art journal, postcard journal, and scroll.   I like her ideas about using old black and white photographs and her inkblot images are intriguing.  When looking at her website I discovered she is also the author of Inkblot: Drip, Splat and Squish Your Way to Creativity, which I have seen used by other art teachers out in blogland. 


The publishers said I could give away a copy of the book to one lucky reader!

 If you would like a chance to win a copy of the book, leave a comment on this post and answer this question:  Do you teach about art journals/artist books in your classes?

Sunday, October 7, 2012

Books and Question about Kiln Shelves


This week, I received two books that had a few of my activities published in them!  I responded to a call for lesson plans by Gryphon House and was happy when mine were chosen.  These look like fun books for a pre-school or kindergarten teacher.  The activities are geared for early childhood.  I have been seeking out various outlets for publishing, since I have always wanted to be a writer.  It's also fun to get free copies of the publications and it's a thrill to see your name in print!  When I was little, my dream was to interview celebrities for magazines! 

An activity about rocks.

What can you do with a dot?  You may recognize this project... I recently posted about it on my blog.

This is a weaving project I do with 1st graders, but it can be easily adaptable for younger kids.

And now a question for teachers who are knowledgeable about kilns....

I have a kiln shelf that has glaze stuck to it.  I have tried scraping it off to no avail.  I simply cannot scrape anymore off.  Do you have any suggestions?  Is this shelf a total loss or is there something else I can do to save it?

<------------------- my poor shelf.
And now a happy picture for you!  My niece Sonia and my daughter Daria playing with bubbles.

Friday, October 5, 2012

Kindergarten Line Sculpture with Wire


Playing with wire


Learning about Lines


Straight, curved, loopy, wavy, zigzag…


Over, under and through


A first foray into sculpture


Tuesday, October 2, 2012

3rd Grade Color Mixing and Self Portraits


These 3rd grade self-portraits were charming and delightful.  We spent two class periods mixing colors for the background.  Each student experimented with combining colors to see what would happen.  Then, we used construction paper to make the faces and markers to add details.  I guided them step-by-step with tips for drawing and placing the features.  The students used mirrors when drawing their features. 


Sunday, September 30, 2012

Halloween Ideas

Hello!  Halloween is quickly approaching.  It is one of my favorite times of year.  Too bad my daughter (3 years old) is scared of costumes and does not like them.  She has said a firefighter costume *might* be okay and she might possibly put one on.  I'm not doing any Halloween themed after school art classes this year (I have a shrinky-dink one that I am doing this week), but I thought I would re-post some of my fun Halloween projects from the past.

Spider Thumbprints

Halloween Wreaths-- this was super fun and awesome, but it was a lot of preparation for a class (many hours shopping).  I would do this again with a small group of kids.


Thursday, September 27, 2012

Complementary Color Collages-- 1st Grade


Complementary Color Collages
by the 1st Grade


This project introduces the first graders to complementary colors.  I show them the color wheel and I explain how the complementary colors are across from each other on the color wheel.  They are the "opposites".  If you mix the two of them together you would get a brownish or grayish color.  We talk about the primary/secondary colors and focus on the pairs of red + green, blue + orange, and violet + yellow.  At this point, a kid usually will point out the intermediate colors and I show them how those also have complementary colors.  For this project, we focus on the complementary pairs I have listed above.  I also read them this cute book called "The Orange Book" by Richard McGuire.  It is out of print, but I picked one up on amazon.com last summer.  The story is about oranges, but the pictures are all printed in orange and blue (which is one of the complementary pairs we will be using.)  I often like to read a story book that is inspiring to the subject matter we are studying.
A bag with orange and blue materials.


Preparation:  Gather colorful materials and place them in ziploc bags according to complementary pairs.  I include:  paper scraps, colorful tape, foam letters and pieces, stickers, colored cellophane, pompons, crepe paper, paint chip samples and stamps.  I have these fun marker stampers:  Crayola 10 Count Expressions Washable Mini-Stampers which I put out for the children to use.  This is a great time to use up those bits and bobs and random scraps.

After the introduction, I place the bags of complementary color "stuff" at different tables.  Then I say, "All the students who want to use orange and blue in their collage, sit at this table." and so forth.  Usually the class is pretty evenly distributed.  Then, they use the materials however they would like to make a complementary color collage.  

I like this project because it allows the kids to explore the materials in their own self-directed way.  Each of them comes up with such unique ways to put the materials together.

At the end of the class, whatever is left over gets put back in the bags and I save them for next year (and replenish them as needed.)

in progress collage.

Kids open up the bags, share what's inside and talk about the materials with their neighbors.


This imaginative boy turned his collage into a sculpture!

This boy enjoyed drawing lots of fun pictures with his markers.


-->
How do you teach about complementary colors to the youngest students?

Tuesday, September 25, 2012

Alphabet Art: First Grade


This is a lesson I love to teach at the beginning of the year.  The first graders create a picture using letters.  I show them how draw the letters and stack them, twisting and turning the page, making sure to connect the letters.  Below is an example of the shapes formed from the letters.  I really loved this one, because even though the boy used letters (a lot of "O's) to make the design, it is very abstract and not immediately recognizable as letters.  I especially like the little dangly letters at the bottom. 


After drawing with pencil, the letters are outlined with black marker and the spaces colored in with markers.  Some of the pictures contain clearly drawn letters, others look more abstract, with the letters layered and overlapping.


I showed the students a Powerpoint of artwork from Stuart Davis, who incorporated a lot of letters, words and numbers in his art.  I wanted to show the students how text can be a part of art and how the shapes of letters can be a very interesting element to use in an artwork.

When teaching art history with the little kids, I keep it short and at their level.  Show them some artworks, ask them to tell me what they notice about the artwork "What else do you see? What do you think he was thinking when he made this?  What are the colors like?, etc"  If there is a good children's book to go along with the artist I will read them that.  The whole art history portion is kept brief, because when the kids come in to art class they are itching to just make art!  This Powerpoint had about 7 or 8 slides.  Using Powerpoints is an essential part of my teaching! I use a powerpoint for about 1/3 of the lessons I teach.  I should write a blog post about how I use them.

Anways, I hope you enjoyed this lesson and it is a really fun one at the beginning of the year.  I think it is great for teaching the kids to see an every day subject matter (the alphabet) and using it in creative way.  Also, every single one of these turns out just beautiful and I really enjoy seeing how they arrange their composition.


This one is great because he included Chinese writing as well.


LinkWithin

Related Posts with Thumbnails