Art is Basic has moved!

Art is Basic has moved!
Visit my new blog location by clicking on the Art is Basic logo.
Showing posts with label texture. Show all posts

Saturday, January 19, 2013

How to Paint Gorgeous Clouds with Watercolor-- 5th and 6th Grade

Clouds. Aren't they amazing? 
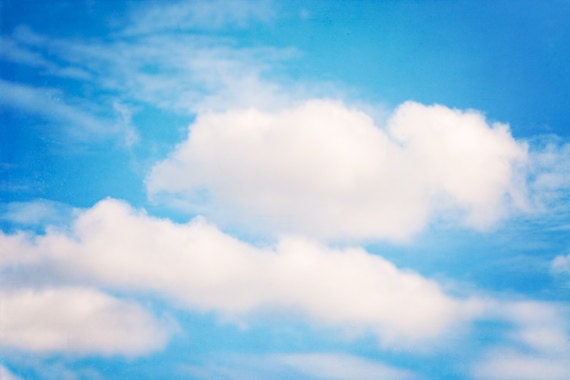
Cloud photography by Carolyn Cochrane  (visit her Etsy shop by clicking on the link)


Two years ago I took a very helpful watercolor painting class.  One of our assignments was to paint clouds. 

Painting by Marcia Beckett

Connecting Art with Science

I love to make connections with other subjects.  This one is perfect for my 5th/6th grade because in Science class they study cloud identification.  They come into my class with a broad understanding of clouds which makes my lesson richer.  

Clouds and Art Resource

The Clouds in Art Gallery is amazing.  This gallery features famous paintings (for example, by Van Gogh, Constable, Turner, Renoir) with the clouds identified.  To start this lesson, I downloaded the powerpoint from the website to show my students.

The One Tool I Can't Live Without for Watercolor Painting

Hands down, my favorite tool for watercolor painting is the fan brush.   Buy fan brushes in a variety of sizes.  If your budget is small, start by buying a small assortment every year.  They are indispensable for creating texture! 
Blick Scholastic Wonder White Fan Blick Scholastic Wonder White Fan
Blick's White Taklon delivers the texture and responsiveness of Red Sable, yet holds up to the caustic nature of solvents and acrylic paints with greater durability, making these brushes a must-have for the classroom. The selection of shapes and sizes available means there's a Wonder White brush for every media and application. The sharp point has good spring. Long handles are finished in blue gloss with nickel-plated brass ferrules.


Tips for Using the Fan Brushes

1.  Find reference photos of clouds to use while painting.

2.  Use the paper towel to dab your brush so it is not dripping wet.  A dry brush will create a nice texture.

3.  Use a light feathery technique to make the texture in the clouds or grass.  Look at this video to see what I mean.  For the clouds, hold the brush flat and dab it up and down.  

4.  When painting the sky, remember to leave the cloud areas white, unpainted.  Paint the sky around the clouds.  While the blue paint is still wet, add other colors (different shades of blues, purples, etc) on top and it will blend the colors together.  Creating variations in the shades makes a more realistic effect.  

5.   Go back in to add depth to your clouds with light touches of grays, pinks, purples.. the sky's the limit! 


Additional Tips for Watercolor Painting Landscapes

  • If you can afford it, don't skimp on the quality of the watercolors for kids.  It does make a big difference, in my opinion.  Every two kids can share the paints.  So if your highest count of kids in a class is 26, buy 13 sets if you can.   Simply instruct them to place the watercolors in between them.  I also find that this helps them to monitor the muddying of the colors.. no one wants all their paints to turn black from careless mixing.   
  • Use a sea sponge for rocky or sandy texture.  
  • As for paper, I have experimented with a lot of paper and I am still on the never-ending quest to find the perfect, non-wrinkly, affordable watercolor paper for kids.  PLEASE let me know if you have any recommendations.  What I have used recently for painting with watercolors and tempera is White Tag Board from Nasco.  I find that it takes paint well and looks pretty nice.  I have not been afraid to get out the iron and carefully iron paintings that have buckled.  Another option is to take a stack of heavy books and place them on top of the dried paintings.  What do you do?


Wednesday, October 10, 2012

Leaves!-- Kindergarten


Always a popular fall activity, we made leaf rubbings last week.

Then, using our new Gelli Plates, we pulled prints of the leaves.  


To do this, we rolled acrylic paint on the plate.  The kids then rolled textures in the paint using texture rollers.  Leaves were placed on top.  Then, white paper was placed on top of the plate.  We rubbed the back of the paper with our fingers and then pulled the paper off to reveal these leaf prints.                                                                        


To keep the activity organized, I had the kids at their tables doing the crayon rubbings.  Then, I called the kids up three at a time, so I could monitor the printing.  The kids had so much fun using the texture rollers, that sometimes they would roll and roll and roll until the textures were just kind of lumpy.  oh well!  I think we will have to break out the texture rollers again and just play with them on paper.  I precut all of the construction paper squares in various shades of orange, red and yellow.  The next period, the kids gathered their leaf rubbing, leaf print and chose one colored square.  They glued them all together and then could add marker on the frame if they wanted. 


Sunday, November 6, 2011

Textured Teddy Bears-- Kindergarten


The focus on this project was learning about texture.  The children used texture plates to create texture rubbings on the fur.  On the inside of the teddy bear's stomach, they drew a creative design.  Then, they learned about patterns and read the book Lots and Lots of Zebra Stripes.   The border was decorated with patterns.  Yeah, they look like Care Bears, don't they?   Sooooooo cute!


Monday, October 24, 2011

Nonobjective Line Drawing-- 3/4s

Third/Fourth Grade:  The students learned how to identify realistic, abstract and non-objective art.  The 3/4s worked on a non-objective graphite drawing.  Using only shapes, lines, texture and value the students drew an interesting non-objective design.  Non-objective art is art that has no recognizable objects.  Value in art is the degree of lightness or darkness.  The students completed a value scale using pencil.  They learned how to create contrast by placing dark shades next to light shades, rough texture next to smooth texture and incorporating a variety of sizes in their art (tiny, small, medium, large).  Their drawing needed to have a variety of lines, texture using texture rubbings, contrast, use of pressure, layering and blending, and five values (white, black, light gray, medium gray, dark gray).  One of the artists they looked at is Wassily Kandinsky.  


Friday, October 1, 2010

Texture Teddy Bears

To complement the teddy bear theme in their classroom, the kindergartners drew a teddy bear in art class with crayons.  We used texture plates to create texture rubbings on the fur.  On the inside of the teddy bear's stomach, they drew a creative picture.  We also learned about patterns and read the book Lots and Lots of Zebra Stripes.  Patterns were drawn around the border.


LinkWithin

Related Posts with Thumbnails