This is a picture-heavy post!!
The 2nd graders reminded me that we had not done any clay this year yet! How could that be? So I decided to try this project that I come up with based on a clay flower in a pot that my sister-in-law has. I'm not sure where she got the flower but I think it was picked up at an art fair or something... We used regular firing clay, acrylic paints, beads, and a flower pot to construct our creation. Other things we used were wooden skewers, paint markers, styrofoam and fake grass.
1. Make beads with clay: roll out slabs and cut out your shapes. Poke a skewer through them to ensure they will fit on the stick. Fire and paint with acrylics. Next year, I am ordering a bead hanger for glazing, so they can be glazed beads.
Make a flower: roll out a slab and cut out the large flower. We did use cookie cutters for the flower shapes, but of course you can cut them out yourself.
We were pressed for time, so we wanted to work quickly.
We were pressed for time, so we wanted to work quickly.
 |
| The flower needs to have a coil "handle" on the back so that the skewer can slip though it. |
2. Cut a styrofoam ball small enough to fit in the bottom of a flower pot.
3. Place the styrofoam in the flower pot.
4. Press a skewer into the styrofoam. Put fake grass in the pot to cover the styrofoam.
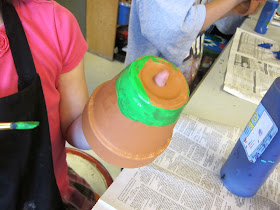
5. Paint the pot. You can do this at any step in the process.
6. Place the beads and the flower on the skewer. You can use a combination of the clay beads and pony beads or other commercial beads.
6. After you place the clay flower on, poke another fake flower into the pot for extra decoration.
 |
| Fake flower on top! |
 |
| We decorated the beads with paint markers! |


I love these! They are definitely on my must do list of ideas. Would be a great Mother's Day project. Thank you so much.
ReplyDeleteElizabeth